
So you've spent the last few weeks (months) working on your Diamond Painting masterpiece. Now that it's finished, one question remains:
"How do I display this thing?"
People need to see your stunning artwork!
Fortunately, there are many different options when it comes to displaying a diamond painting, depending on your budget and willingness to get crafty!
Based on our personal experience and feedback from our wonderful customers, we've created a ranking of the 7 best display ideas for your finished kit.
Quick note on sealing your kit: As a rule of thumb, if your finished painting fits tightly behind the glass or plastic in your frame, there's no need to seal your kit. If you're using a method that exposes your diamonds to the air, you'll want to consider sealing it before mounting.
7. Glue Your Diamond Painting To A Blank Pre-Stretched Canvas

Budget: Medium
Difficulty: Low
This strategy involves buying a pre-stretched canvas from your favorite craft store (or Amazon) and simply gluing your finished canvas onto it. The hard part is already done for you - no stretching or stapling necessary!
Use a spray adhesive on BOTH the back of the painting and the blank canvas. When the glue feels sticky to the touch, place the painting carefully on the canvas, smoothing it down as you go and removing any wrinkles or bubbles. Let dry for 24 hours and you're good to hang!
Pro Tip: Find the proper fit for your painting by measuring the canvas after you've already cut off the borders. If you don't want a large border, buy a canvas as close to the measured size as possible.
6. Apply Stretcher Bars To Your Finished Canvas

Budget: Low
Difficulty: Medium
For more of a DIY approach to mounting, grab yourself a set of Stretcher Bars. The instructions are super easy to follow and result in a beautiful display with some added depth.
For more details on using Stretcher Bars, check out our handy guide.
Pro Tip: Be sure to buy a size about 5 cm shorter than the canvas so that you have room to wrap. We love the cool effect of seeing the diamonds wrapped around the borders!
5. Mount Your Painting To A Foam Board Or Cardboard

Budget: Low
Difficulty: Medium
This technique involves a bit of measuring and cutting. Head down to your local craft shop (or Amazon) and find yourself a foam board.
To create a flat, borderless painting, use box cutters to cut the foam board down to the same size as your canvas (not including the canvas border). Then simply glue your painting to the foam, making sure it's centered with only the borders hanging off.
Fold the borders over the back of the foam board and glue the firmly down, making sure the canvas is tight to the foam board.
Pro Tip: Cut a border for your painting from oak tag before mounting it to your foam board for a more 'framed' look. Alternatively, jazz up your border with some colorful washi tape and just tape your canvas right onto the board.

4. Use A Poster Frame To Present Your Work

Budget: Medium
Difficulty: Easy
For a less DIY approach and more professional look, consider grabbing a standard poster frame from your local craft or hobby store.
Poster frames are perfect for framing large diamond paintings. They can be purchased in Walmart or Target for under $25. Just open the frame and place your diamond painting behind the plastic (poster frames are plastic - not glass).
Be sure to flip the insert around and put it behind your painting before you put the back on so that any exposed borders will be solid white. Put the back on and you are good to go!
3. Find Frames At Your Nearest Thrift Shop

Budget: Low
Difficulty: Easy
Who knows what ornate frames are hiding at your local thrift shop! Do some treasure hunting to find beautiful, affordable secondhand frames that match the size of your diamond painting.
2. Have Your Painting Professionally Mounted And Framed

Budget: High
Difficulty: Easy
Sit back, relax, and let the experts worry about it! Large craft stores have a whole section dedicated to mounting paintings, including diamond paintings. You can hand pick your frame and matte from an enormous array of colors and wood designs.
Because this option might be on the pricier side, be sure to look for coupons online. Michael's routinely offers 20-70% off coupons.
1. Buy A Traditional Picture / Photo Frame

Budget: Low-Medium
Difficulty: Medium
At the end of the day, you can't go wrong with a standard photo frame. When it comes to quality and price, we recommend IKEA which has a huge selection of designs ranging from classic to modern.
Pro Tip: Buy a frame that is closest to the size of your painting. Simply cut the matte with a utility knife and a ruler. Be sure that you are cutting straight! Measure in three places (ends and middle) and mark before you cut.
Some Tips And Advice

1. Although all of our suggestions provide wall to wall framing for your painting, you can choose to fill in any blank space on the top, sides or bottom with small photographs that are relevant to you painting, especially if it is a custom.
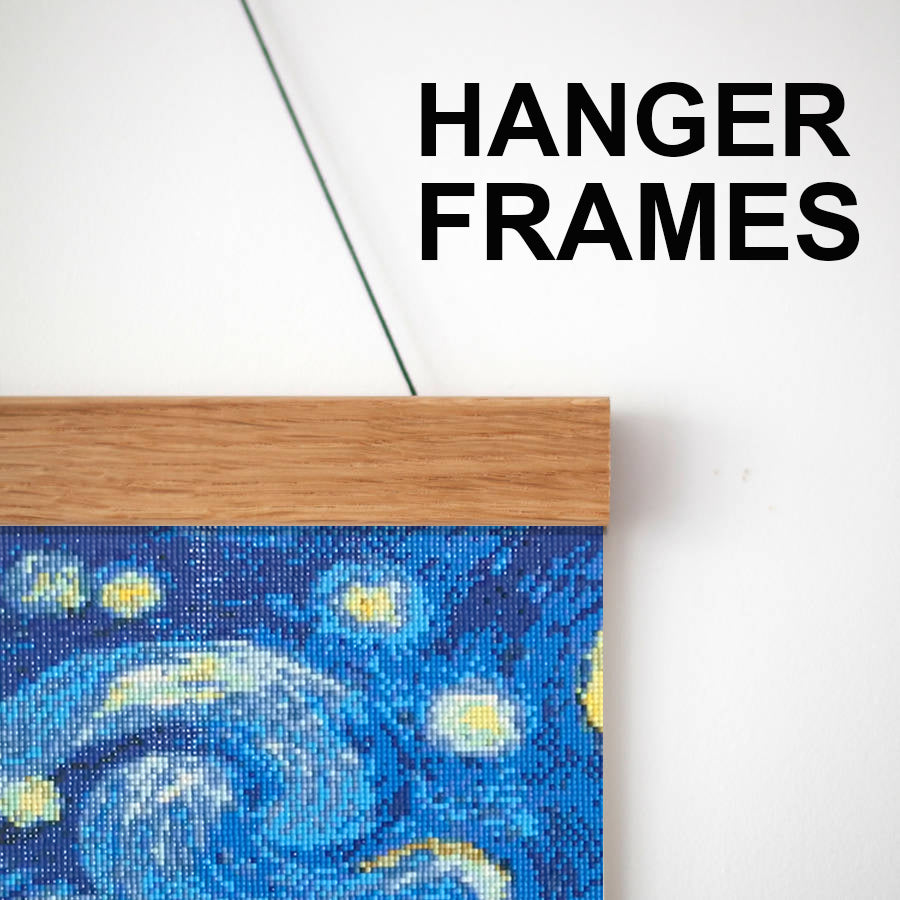
2. You can turn all options, especially the "do it yourself" ones into hanging frames by attaching a ribbon or rope to the frame.
3. No matter which option you choose, including (and especially) store bought frames, ALWAYS glue the painting to the back of the frame to prevent slippage. Diamond paintings are heavy and will start to fall inside of the frame with no glue or double sided tape.
4. If you're using foam or cardboard to mount your kit, consider using Velcro strips along the top and sides of the back to affix it to the wall.
So there you have it! 7 amazing ways to frame your PWD.
Have you tried displaying your finished diamond paintings? Let us know about your experience in the comments down below!
Comments
Carlene Gober said:
I’m new to diamond painting and have some that I want to frame. So do I use the sealant on them or the clear krylon. So when I have it framed do I need to use mats with them so the glass doesn’t touch the dots.
August 29, 2024
Debra Smith said:
I did the Last Supper diamond painting, it’s 40×85cm, and it’s beautiful. I need a frame for it (no glass). I like to put It on a self adhesive back, but want to hang it on the wall not adhesive it o the wall. Call you help me with this or other ideas and where to get it. 😊
August 29, 2024
Karen House said:
Any suggestions for mounting a circular piece?
August 29, 2024
Janice Bengtson said:
Thanks for sharing all the info on framing I’m waiting for my first project to come can’t wait. My sister does these all the time
August 29, 2024
Mary Anne Audette said:
For the beads I use left over pill bottles, I cut the bag put the beads inside add the cover. Then I cut the label on the bag attach to the pill bottle, and add with a marker a number or letter corresponding to the chart on the picture. And then I am ready to start.
I have made two pictures so far, and I just reuse the bottles and put on new labels according to the next project!
What cleaver things does everyone do with the left over diamonds??
August 29, 2024
Linda said:
I’ve just finished my first 3-panel set. I’m worried about the diamonds coming off. Is it really necessary, or preferred to put them behind glass? Thx!
August 29, 2024
laura baxter said:
I use magnetic frames from amazon…makes it easy to swap pictures out too
August 29, 2024
Susan williams said:
I took mine to hobby lobby to have it framed ,matted and glass over it , I ordered a wall light for over it , doesn’t sparkle as much as without glass . What kind of wall light would you recommend
August 29, 2024
Ellioja said:
I trim my canvas to about 1/2 inch border. I then use Krylon gloss clear or extreme glitter to seal the painting. Then I use spray adhesive to spray the back of the canvas and affix it to my board. I often then will use washi tape, ribbon, or fancy paper to border the painting. If I’m using a canvas board larger than my painting and border I’ll pain the board first in a color that compliments the painting and border.
August 29, 2024
Martha said:
So glad I read all your posts. I have two finished canvases ready to be framed. I had a Spider Man canvas frames professionally. It was pricey even though the framing was on sale. I will try one of your suggestions this time around.
I am hooked and ready to start another one.
September 19, 2022
Lettii said:
I have been working diamond paintings for about 2yrs now and have tried many techniques from diy to store bought. So far the best technique I have found is a diy variation. Once I have completed a piece I spray it with Krylon UV resistant acrylic CLEAR coating. The CLEAR is very important. As I am also an acrylic painter I use this on finished painted canvases, woodworkings, and several other crafts I complete. Ensure you keep the can about 6-8 inches away from the canvas spraying in steady even swipes. DON’T overdo it. It doesn’t take much. It is best to do one short quick pass at a time. It dries within about 5-10 minutes. Occasionally I will do a second pass however it is important you pay close attention to ensuring it is even and thinly coated or your colors will immediately dull and the diamonds will lose their shine if it becomes covered with too thick of a layer. If done correctly your diamonds will actually appear shinier! Afterwards I clue the canvas to a foam board using the above listed technique and occasionally will add a border depending on the price w pre cut measured to size wood from the hardware store such as Home Depot. You can also have prices of plexi and regular glass cut as well to fit over the finished product if you choose! Of course this method is not for everyone but, you can create an entirely separate price of art by building your frame with this technique and get the exact look you are going for!
April 19, 2022
Marilynne said:
Thank you so much for all the helpful advice and ideas – from a complete beginner, looking forward to starting!
September 28, 2021
Sue Murray said:
How do I turn my diamond art into placemats
September 28, 2021
Rochelle said:
Hi do have n soudafria
September 07, 2021
john matteson said:
i out line my paints/pictures with popcile sticks
April 13, 2021
Alice said:
I am concerned on how to hang my diamond art. I had a small one and used mostly and it dulled all my sparkle! None left. I am so discouraged. So now I do not want to put anything over the diamonds as my next one is done so I guess I will try a Frame with glass and hope it will sparkle. They are just beautiful but if the sparkle is gone you loose the joy of it. Any help. I am working on my third one and have one more. Please help!!!! Email me. Please!!
February 15, 2021
Pat said:
Has anybody tried found a way to use these as displays on a table? Like a placemat?
January 13, 2021
Gwen said:
Thank you so much for the brilliant ideas on this site, I will definitely trying some out..I love diamond painting, but find the framing part difficult…
January 02, 2021
Judy said:
Does anyone know of an acrylic serving tray for displaying art between two layers of acrylic as the base of the tray that I could put the Diamond Dots picture between the two layers?
December 16, 2020
Teresa B said:
I usually frame mine behind glass using frames I have picked up in thrift stores or yard sales. I have used poster frames from Walmart as well, however my latest dp I painted the sides and edges of a canvas slightly larger than my dp. I then glued it to the canvas using spray adhesive. To keep the diamonds in place I put 2 coats of Mod Podge over the dp taking the extra step of wiping the tops of the diamonds with a damp cloth so it still has all the sparkle. It looks amazing.
December 16, 2020
Kathy Height said:
I have finished a 40-40 picture and had to professionally have it mounted because I could not find a mat. the three that I have just finished
I will try the poster board. Thanks
December 16, 2020
Milton said:
I’m concerned about the diamonds staying attached. Figured I’d mount it tight against the glass. Can anyone provide assurance or suggestions from experience? Thank you.
December 16, 2020
Linda K Wellin said:
I enjoy very much doing diamond art. I have frames 3 of my pictures and 3 I made into pillows. Everyone is so happy with them. Thank you for all your help.
December 16, 2020
Leeann said:
I got this idea from a DIY video. You get paper from- newspapers, wrapping paper or magazines. Using a tool that is pencil shaped, you roll up several bars. You glue them together and then glue to the painting. Looks great
December 16, 2020
Karen said:
Is it safe for the diamond picture to have the diamonds touching the glass in my frame,
or should I use a matting in front of it. I have an 11×14 to frame, and if I need a mat,
I will need to go a size up in the frame.
Thanks for any help you can give.
March 03, 2020
Tom Chekel said:
Michelle Farley
October 18, 2019
In pasted (used regular glue) one of mine to foam board, but it has curled upward (kinda like it warped) on the sides. What did I do wrong?
You did nothing wrong…it’s just the medium you used. Foamboard is not stable and over time it will usually “bow.” Consider alternative mounting mediums.
January 09, 2020
Linda Marsico said:
Can extra packages of diamonds be purchased?
November 20, 2019
Sandra D. said:
G. Gilbertson, I’m thinking your idea is the best for my 80 × 140 cm peacock. Thanks for the tip!
October 18, 2019
Liz Felix said:
I forgot about putting a sealer coat over my art. I actually used clear plastic laminate over the whole surface which bonded very well. I placed my art in a simple, magnetic, hanging frame. Beautiful!
October 18, 2019
Susan said:
Thanks so much for sharing all this info! It is very helpful!
October 18, 2019
Carol A Bennett said:
Try Frame It Right. Very low budget, some measuring required, but is great easy to frame.
October 18, 2019
Sherrie Wallace said:
I mount my pictures to a thin board, then paint the board edges to match to bead color of the area. Makes it look like the picture continues around the side.
October 18, 2019
Michelle Farley said:
In pasted (used regular glue) one of mine to foam board, but it has curled upward (kinda like it warped) on the sides. What did I do wrong?
October 18, 2019
Kathy King said:
I have done about 14 now have 2 more to work on. Have always used stretch bars. But this info is very informative. Thank you
October 18, 2019
Ruth Johnson said:
Great article, very helpful. Gave me the little extra info to reduce the anxiety! Thx!
October 18, 2019
Susan said:
Looks like I’ll be making a trip to our Thrift Shops. Thank you so much for great ideas on framing our art.
October 18, 2019
Barbara said:
I framed mine in what is called a “float frame.” It’s basically a sandwich of two pieces of glass, with a hard frame around it. It looks really nice! I mostly did it that way because I couldn’t find the right size frame for it, but it turned out to be to my advantage!
October 18, 2019
Carol said:
I’ve made about 10 so far and have used frames purchased from Amazon.
The plain black brings out all the color. They have the odd sizes more than Michael’s. They have all ranged about $10.00 and it’s worth every penny. It’s too much work to loose diamonds from the paintings.
October 18, 2019
Jeanne Theunissen said:
I bought pre-cut self-adhesive foam board, then my husband covered the edges with channel aluminium which he spray painted black.
October 18, 2019
Barbara said:
I use Krylon sealer, glitter blast clear! No complaints, although I’m fairly new in this area. But the look is fantastic. I wish I had seen this sooner. I’m not very imaginative so it really helps to see this kind of information. I have already framed a few and hope they are good without the added care! So much time goes into these projects and I’ve completed several customs, that I want to take every care to preserve them.
October 18, 2019
Renee said:
I love to use thrift store frames. Select a frame that’s slightly smaller than the painting BEFORE making the dp. Apply diamonds only to the area that will show. Then you won’t have to remove rows of diamonds to make it fit properly. The sticky border also adheres nicely to the mat.
October 18, 2019
Jean said:
I ordered the bear but did not receive it. How come?
October 18, 2019
Brenda said:
I can you make a pillow cover with any
October 18, 2019
Rita Lozon said:
Thank you for sharing your ideas for framing.
October 18, 2019
Kathy Donnelly said:
Great article! I also covered my custom with duct tape “frame”, sealed with Krylon clear gloss spray and hang with clear alt frame kit.
October 06, 2019
Debi White said:
Thank you, for the free lessons on framing. Your Co. Thinks of everything. I’m so happy I found your paintings. It makes my retierment so much fun,and my sister’ also. Your happy friend, Debi White
October 06, 2019
martha angelino said:
go to GOODWILL and pick up cheap frames. Some come with mats that will match your pictures. Replace glass with clear plastic sheets.
October 06, 2019
Nancy said:
Thank you so much for this info! It’s great to have so many options in one place for future reference. Invaluable!!
October 06, 2019
Lori Kennedy said:
What great suggestions! Thank you for sharing!
October 06, 2019
Georgianna Horn said:
I have completed 14 pictures and had Hobby Lobby frame all of them. Have been more than just satisfied, love them. Some of the pictures are matted.
October 06, 2019