
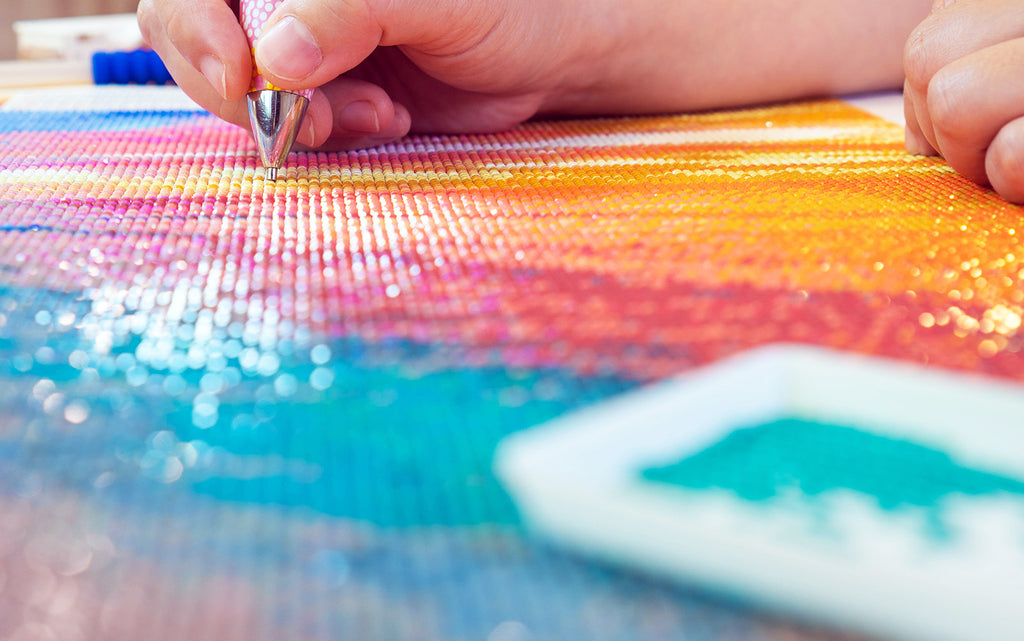
We LOVE diamond painting. There's absolutely nothing better than unboxing a new kit, prepping your canvas and tools, and spending countless hours putting diamonds to canvas to slowly reveal a masterpiece of your own making.
Fortunately, we're not alone in our addiction to this amazing new craft hobby! The passionate folks over at the official Paint With Diamonds Support Group are always sharing progress, tips, and tricks that make paint with diamonds lovers absolutely giddy!
We've gone through hundreds of posts to find the best paint with diamonds tips and tricks. Read ahead for our favorites!
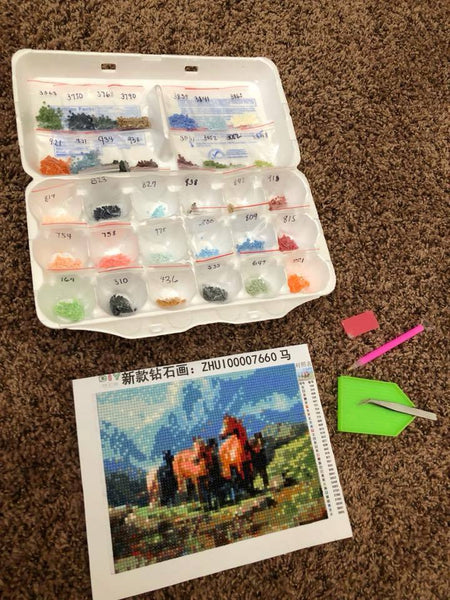
7. Use egg cartons to organize your diamonds
Raise chickens? Or did you just cook an omelette and use up all your eggs? Use the container to organize your diamonds! Courtesy of Niña Conklin.
6. Tape or glue your diamonds next to their symbol on the canvas.
Easily reference the diamonds you need at quick glance! Tip courtesy of Heidi Proctor and Angela Earley!

5. Use a marker to put the number or symbol on each diamond bag.
If egg cartons aren't your style, simply sort the diamonds into the plastic Ziploc bags included in your kit. Then write the corresponding number or symbol on the outside of the bag. Tip thanks to Kelsey Kelso Bjork!

4. Use a cutting board as a flat surface for your canvas.
Can't find a good surface to use to complete your paint with diamonds? Just tape the canvas to a normal kitchen cutting board! Just wash it first ;). Thanks for the tip, Suzie Pini van Deurs!

3. Use a multi-diamond applicator tool to speed up the process!
Don't be afraid to pick up more than one diamond at a time! Most of our kits come with a double-sided tool that lets you pick up one diamond at a time, or a bunch! Tip courtesy of Brooke Stubbs.

2. Flatten your canvas by sleeping on it. Literally.
This one comes straight from Ali King, who says, "put it between two pieces of cardboard. Put that under my mattress and sleep on it overnight. Works great! I do that once I'm done with it as well, just to make sure all the diamonds are fully adhered."

1. Stop static cling with dryer sheets.
Isn't it annoying when your diamonds stick to everything BUT the canvas? PWD fan Ariel Rocha recommends cutting up a dryer sheet and placing small pieces of it in whatever you are storing the gems in. Game changer!

Have an awesome tip that we missed? Leave it in the comments below! And don't forget to share this post with your fellow die-hard paint with diamonds fans!
Comments
Patricia A Richardson said:
Where are the answers to all the questions?
August 29, 2024
Mary said:
I been using my empty prescription small bottles to put my diamond art beads in
Then take off label and use a sharpie to label color
Example A-4
August 29, 2024
Mary said:
I been using my empty prescription small bottles to put my diamond art beads in
Then take off label and use a sharpie to label color
Example A-4
August 29, 2024
Julie said:
I found on Amazon, Custom Diamond Painting Kits, Personalize where they take a photo of yours and make it into a Diamond painting. I had one done of my daughters family at Christmas time. The first one I ordered was to small and the faces were a little bit distorted so I contacted them and they suggested I order a bigger one. So, I ordered a 20×20 inch or 50×50 cm. It turned out so fantastic! You can do this with any photo you want.
August 29, 2024
kaylah smith said:
how to leran diamod paint
August 29, 2024
Pat said:
The light pad works really good!
August 29, 2024
Sammi said:
Use the medicine cups from drs/hospitals as trash drill holders. (I learnt this when I was bred bound in hospital and kept finger dodged drills cos I’d taken a cheap kit in with me 🤣)
August 29, 2024
Betty said:
What great ideas! Thank you everyone. I really like the idea of putting the diamond dots along the ledger.
August 29, 2024
Lindsay said:
If you don’t like the wax, I have found using a jewel pen works great. It’s a pen that has a rubber sticky tip that stays tacky an can be cleaned off if loses stickiness an good as new. last for a long time. Hobby lobby sells them in the jewelry section by the beads. Thanks for all the tips.
August 29, 2024
Paula Clothier said:
I pour my dots into the jar containers and I put the number on the container and pour into my tray whatever # I am working on. I save all my leftover dots you never know when you will come up short.
August 29, 2024
Morgan Jolly said:
Using either clear packing tape or clear scotch tape cover the legend this creates you’re own white board allowing you to use dry erase markers to check off completed colours
August 29, 2024
Harlean Greathouse said:
I dip my pen into a piece of damp sponge instead of using wax. You can place 8 or 10 drills before you hit the sponge. Or you can clean off your pen and touch it to your tongue to pick up the drills. Lots faster than changing or rearranging the wax.
August 29, 2024
Deborah Wilson said:
For the larger pictures I use diamond art release paper I purchased from Amazon. I remove the larger sheet that covers the painting and replace it with the smaller release paper. I only take off one at a time , finish that section and move on to the next section. Much easier to work on smaller sections and not have to worry with the large cover sheet the painting was shipped with
August 29, 2024
Janeen Huff said:
I use small jars (the kind you get at hotels with jam in) to put my colours in. I then cut the number out of the bag the beads were in and stick them to the top. Voila! Easy access to the beads, especially that annoying 1 or 2 I missed.
May 17, 2023
Barb said:
Does anyone have any tips on the round beads turning them over from flat side to the round side? I’m doing my very first diamond painting love it but the beads are always flat side up 🥵.
May 17, 2023
Donna said:
Can you put all the same colors together in a container and can you change the diamonds drill on a picture thanks let me know
January 04, 2023
Kimberly said:
I love diamond art .does any body know tricks I just brought new stick stuff but it keeps coming out of pen
September 19, 2022
Kim said:
Can you melt diamond art dotz in a Tinfoil container if so for how long I’m the oven??
August 17, 2022
Kay said:
I use tictac containers for my diamonds and number them with sharpies!
August 01, 2022
Susan Johnson said:
I have all my drills in little ziplock bags 1”x 2”. I put the number on the bag. They slide into the pockets of the clear pages used for baseball cards, I get them at Hobby Lobby. Everything fits into a 3 ring binder. Then I organized them by color. When I want to do freehand pictures it is easy to flip through the pages and get just the right color. Great idea for all the leftovers from kits.
July 13, 2022
Shashi Nangia said:
I am from India.I bought diamond painting from Canada.I finished my painting and it’s come out so beautiful. I want to do more. Thanks
June 14, 2022
Diane Fulbrook said:
I find using a curved point tweezers to pick up the diamonds much easier on my hands. Easy to move the diamond around. Also for big spaces that have the same number I pour a small pile of diamonds over the space or a long the line. Easier on my wrist,
June 09, 2022
Cindy said:
Instead of a lightpad, I prefer to use a headlamp with rechargeable batteries.
I find a tilting table is best to work on my DP projects as it can be adjusted to suit the size of my project & helps prevent shoulder & neck pain.
I use clear packing tape to stick my canvas onto my tilt table & when I’m getting close to finishing, I simply unstick the canavs & move it lower onto the table. Either a small piece of sticky tape or a couple of bulldog clips keeps the clear plastic off my work area.
Hope my tips help others out there who have discovered this relaxing & very therapeutic craft!
May 25, 2022
Anne S said:
Canvas not laying flat? Lift the film up at one corner, peel to the center and reattach. Repeat with each corner. Your canvas will be completely flat in less than a minute.
May 25, 2022
Kim said:
Mine is a question rather than a comment.
I am diamond dotting a pillow which goes right to the edge of the canvas.
Can anyone suggest what to do with the final row of dots as the the letter/symbals are not straight with only half showing in places? very hard to do and doesnt look the best
Keep smiling and dotting 🌸
April 04, 2022
Joyce ohman said:
For framing, I’m going to get an artist canvas an inch or two larger than my diamond painting and glue the trimmed painting centered on it. Then I can paint the margins like a frame. Maybe use some skinny decorative wood around it to mimic the look of a wood frame.
April 04, 2022
Joyce said:
Love the idea about using the egg cartons to line up the diamond packs. I use a French rolling pin to go over my picture after each setting. TIP: To get the diamonds to stick, dip your applicator in the wax several times until you see the pink. Works perfectly. I’m doing square diamonds and if it’s a little crooked when I drop, I use the tweezers to straighten. I love the squares. Happy painting!
April 04, 2022
Diane Angle said:
When I get my picture done, I use a rubber brayer to roll over my finished picture. It helps the push everything down and into the glue. Haven’t had a problem with any loose diamonds…
February 01, 2022
Karen R said:
I like the idea of gluing a dot next to its symbol, I used to do that with a snip of yarn along my tapestry/needlepoint canvases. I never thought of the egg cartons or dryer sheets but I will definitely try them as well as using a marker instead of a pen to mark bags, pen ink can be so hard to read. Thanks for the tips!
February 01, 2022
Pam Jennings said:
How do you keep the square drills straight in line? Makes me nuts when each one is crooked!
February 01, 2022
Deborah said:
Use a clip skirt hanger to hang up finished Diamond Art Painting projects. You can put 2 on one hanger if you place them back to back.
February 01, 2022
Lukas Nguyen said:
Hi! there,
It’s actually a piece of unique and informative stuff. Thanks! for sharing with us…
December 29, 2021
Marsha Rosenbarger said:
I bought an Arts & Craft LED light board that is battery powered so I can be anywhere to use it. It’s about 17"X12.5" and super thin. When I put my canvas on it it really shows up the dark areas plus I found a couple of places where I missed a gem. Now it’s my favorite “must have” tool.
November 15, 2021
Teresa A Emerson said:
My current 5d is 3ft by 4ft. The tips I am seeing are great for smaller paintings but the amount of square drills I have won’t fit in any of the suggested storage. But to answer a few questions I’ve seen. On square drills the flat side ( biggest flat side) goes on the canvas. Also, there are 3d and 5d which determines how many cuts or angles there are to catch light so make sure when storing your extra drills your not mixing them. If you look closely at your diamond it doesn’t matter which direction you place them on the canvas as far as “twisting” them different directions. It’s personal preference. If your diamonds won’t stick to your canvas you can buy double sided tape and place over your canvas, if your wax won’t pick up your beads try using a bit more wax or buy what others have suggested, if your pen won’t pickbup beads use more max or buy what others who have commented have suggested.
November 15, 2021
DeLaine said:
I use plastic containers for my drills, and Avery 3/4-inch labels which peel off easily. I can then arrange my drills numerically, according to the legend on the canvas. Some kits package their drills in non-numerical order, so I use one of the long boxes a kit came in. I cut off one side down the width of the box to form a “tray” with sides, then arrange the individual packets of drills in numerical order as I fill my plastic boxes. I have not yet had a kit with paper over the glue, all of mine have been cellophane. To keep the plastic off the area I’m working on, I use a little dab of chapstick to hold it in place off the work area to make it stick to the plastic covering where I’m not working. I use a piece of cardboard (the bigger the better) under my works in progress as it provides a smooth work surface and has a little bit of “give.” There are many framing suggestions on YouTube. If you want to be able to change what you have hanging, the magnetic frames are an inexpensive option. For those I want to keep hanging, ArtToFrames has the best prices online for custom sized frames. It is definitely a learning experience and each of us has to develop a system that works for us. Happy to be part of the diamond painting community! Really appreciate any tips and tricks others have learned along the way.
October 07, 2021
arlene claiborne said:
I was doing puzzles after foot injury and had to stay still for months. I purchased an easel type of board from Etsy. Foldable and portable and can use laptop on couch . I use it now for my diamond painting while I sit on my porch table. I do not have to hunch down. It is right there! Saves the back!
September 28, 2021
Dawn haylock said:
Great tips thank you
September 07, 2021
Chili said:
I use a bulletin board and pin the canvas to it. It has a border so any loose diamonds stay on the board. It also makes it easy to move from one place to another.
September 07, 2021
Betty said:
I watched several utube videos befor I did my first picture. Great hints from different videos. One good one is using parchment paper on glued space-it won’t ruin the glue. I also bought from Hobby Lobby the small containers (24 in a box). Cut the color code from plastic bag and taped to inside of screw on lid with scotch tape. Keep them in numerical order. small so take less room. Try it you will like it
July 15, 2021
Donna Kelly said:
I bought glass bottles at the Dollar Tree. I put a round sticker on the top which incudes the symbol, code number and a sample bead. This helps me to stay organized. The label sticker can be removed and the bottle reused as needed.
June 21, 2021
Sharon Wooldridge said:
To hold your paper back out of your way when doing a diamond painting, simply stick a small piece of your wax under the fold and press it down, that way it will not be flopping around in your way until you are ready to remove the wax and recover your painting and go to the next section and repeat the same procedure, it makes it so much easier
May 25, 2021
Pat Hutchinson said:
Why won’t my diamond pens pick up the beads.Have used the pink glue that comes with kits and blu tack.Help please ?
May 17, 2021
Michelle A La Tulippe said:
To frame odd size diamond paintings (or anything you want really), Michael’s Arts and Crafts (or similar type store) carries “partial” frames in 2 pieces at various lengths. All you have to do is pick the sizes you need and follow the instructions to assemble.
April 28, 2021
Kathy said:
I do lot of diamond art paintings and some of my painting aren’t the standard size for a frame. Its hard to find non standard size frames.
Does anyone have any suggestions where I could find them?
April 14, 2021
Peggy Maggard said:
I use a needle to get the air bubbles out of painting.how do u keep your lines straight when working on painting.⁹o
April 06, 2021
Maggie said:
What process do you use to get all the air pockets smoothed out on your canvas before you start? I’m on my 4th one and havent figured out how to remedy this issue
March 09, 2021
Mary Ann Abplanalp said:
I have arthritis in my hands, so opening the containers with the the screw on lids hurt. I use the little glass jars, from the dollar store, they are very easy to open. I tape the numbers from the bags to to the side and tape the numbers to the top for easy selection. I have a small in marked jar for the extra drills if I happen to find a stray. These tiny jars fit nicely into my little wooden storage box along with the tools I use.
March 05, 2021
Jolis said:
For glue when making my own diamond painting with the extra drills, I like using Aleen’s Tacky Glue. I brush a thin layer on my canvas or car stick or whatever, allow to dry. It dries tacky or sticky. Use plastic film to lay over the canvas, just like what’s in PWD kit. The glue will stay tacky until you place your diamonds on it. Try it yourself.
If anyone has something better they use, I’d love to hear it, as I am always looking to improve my Diamond Painting skills.
March 01, 2021
Melissa Motter said:
The light pink colored sticky stuff they give with all kits to use in your pen to pick up your diamonds needs to be changed to fast. It just dont last very long before the sticky is gone. I found that using Jot poster tack works a million times better and don’t need to be changed out nearly as much as the sticky stuff that comes with every painting. I buy the poster tack at the dollar tree for $1.00 and it will last for sooooooo long. I have already done 2 full size 40×50cm diamond paintings and only used not even a quarter of the poster tack. I will use nothing else but that when diamond painting.
February 18, 2021
Sharon said:
I have found when trying to remove permanent ink from your plastic bead boxes, some say alcohol will do it, but it doesn’t completely clean it, but you can use lighter fluid instead (That will completely clean them). That’s all I ever use. You will need to order it from amazon because I couldn’t find it in any of my local stores, hope this helps this way you can keep using the same ones
February 03, 2021