
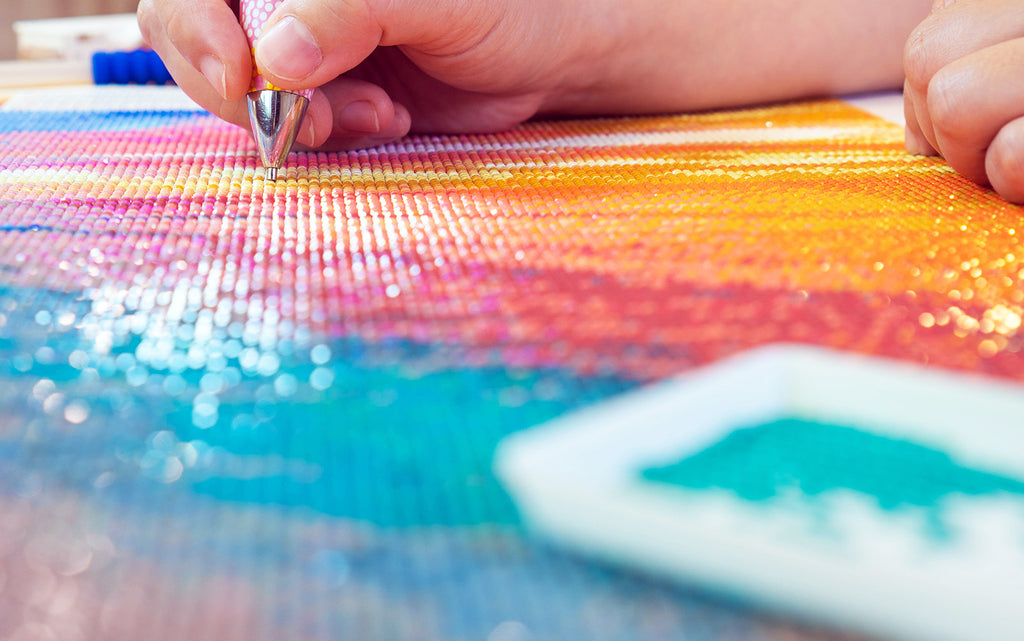
Raise your hand if you've ever made a mistake when Diamond Painting ✋
Maybe your fur baby managed to roll all over your canvas. Perhaps you removed the entire cover all at once and your glue dried. Whatever the case may be, IT'S OKAY - we're only human.
So with this in mind, here are the 7 most common Diamond Painting mistakes that people make, and how to avoid them. Learn from other people's mistakes so you don't make them too!
7. Not Wiping Your Painting Down Before You Seal It

Before you go to seal your finished canvas, make sure to use a wet wipe or moist towel to give your painting a good once-over. Remove any dust or dirt before applying sealant, or you may get unsightly dust clumps (image credit: Sue Small).
6. Allowing Fur Babies (Too) Close To Your Canvas

We have absolutely nothing against Diamond Painting with your fur babies keeping you company. But make sure they don't make a quick jump onto an exposed sticky area of your canvas, or you'll have to spend time de-furring your canvas (image credit: Sue Small).
PRO TIP: To remove hair, paper, etc. from your canvas, wipe down the affected area with a wet wipe or moist towelette.

5. Keeping Food & Drinks In Your Workspace

It's perfectly fine to have a snack when you Paint With Diamonds - lord knows I do! Just make sure to keep your workspace clear to avoid spilling any food or drinks on your canvas (image: Amber Lowrie).
PRO TIP: To remove small amount of liquid, just use a blow dryer on low heat to dry your canvas right up! If there are any spots that aren't sticky, just dab a touch of fabric glue on the area.
4. Not Closing Diamond Containers While Working

After you're done pouring out your diamonds, always close your diamond vials and storage containers! Avoid nasty diamond piles sticking to your canvas.
3. Resting Your Arm On Your Canvas

Have you ever found yourself unpeeling your forearm from your canvas? Lyndsey Hymes shares her tip for avoiding this sticky situation: "I took a section of parchment paper big enough for the side of my hand and laid it down so my hand doesn't stick to the canvas and move as needed ... works like a charm!"
2. Placing Diamonds On The Wrong Symbol

When you're in a groove, it may be a while before you take a step back and realize an entire area has the wrong color diamonds in it. The horror!
One way to avoid this mistake - when you turn a large painting upside-down to work on it, remember to also turn your sorter upside down to so you don't mix up similar symbols - like your 6s and 9s! (image: Cheryl Hope).
1. Removing The Entire Cover Paper All At Once

Of course it may be tempting to peel back the entire canvas cover to reveal the design hiding beneath. However, doing so will expose your canvas adhesive to stuff like animal fur, dust, or dirt, resulting in diamonds not sticking properly. Areas of your canvas may also dry out before you can even get to them!
To avoid this, we recommend removing the cover and working on your painting in rectangular sections. You also get a nice sense of satisfaction when each section is completed.
------
What did you think of our mistakes? Have you made any of these yourself? Any wise tips for your fellow Diamond Painters? Leave your thoughts in the comments!
Oh, and btw - if you ever make a mistake and you bought your kit from Paint With Diamonds, feel free to take advantage of our Oh Sh*t Insurance - free with every order!
Comments
Susan Wambolt said:
What should i use to seal my canvas
January 16, 2020
Christine McCarthy said:
I found this information very interesting. As I didn’t know some of them. Thanks
January 16, 2020
Feye Bartholomay said:
Thanks for all the great tips!!!
January 16, 2020
Doreen -Allen said:
Brilliant tips thanks 👍
January 16, 2020
Jane McFadgen said:
Hello, First. I’d like to say that painting with diamonds is very addicting. I was read some where that you need to be sure to wipe the painting before you seal it, what do you seal them with. Thanks so much! Jane
January 16, 2020
Micki Nixon said:
When I start my painting DId only pull enough paper up so hand & air fuzziness don’t stick to canvas.
January 16, 2020
Brenda said:
I read all of the comments about a light under the painting I am using my cricut light and it works so well
January 16, 2020
Kathy said:
As I read your tips, I laugh since I have had a couple of the hazards you describe, not too bad; but the tips make perfect sense!
January 16, 2020
Sheila Allen said:
How do you seal your painting when finished? Is there a special thing you use
January 16, 2020
Tara L Monette said:
I did an “oh, s$!t” and forgot about the insurance! I don’t have the order date or number… that should also be on the list-
Keep all correspondence!
January 16, 2020
Mary Henderson said:
What brand fabric glue is used to repair non sticky areas? Also, what is used and how does one use it to seal finished paintings? A video would be most helpful!!
January 16, 2020
Darhl Simkin said:
I’ve made many mistakes, but I’ve been able to correct it before panic set in. Thanks for the tips
January 16, 2020
Bess said:
Be very careful when you have a ceiling fan on under your work. My directions flew into my DP
January 16, 2020
Shelley Harris said:
Didn’t know you were suppose to seal picture. What do I use?
January 16, 2020
Jan Xinaris said:
I cut my large cover sheet into three strips, peeling back a section at a time. When that section is complete, I use that strip to rest my arm for the rest. Also, , my light pad has been the best thing ever, much easier to place with precision.
January 16, 2020
samantha said:
I really enjoyed reading what can go wrong whilst diamond painting.
I found the article very interesting to say the least.
Thank you for the tips.
January 16, 2020
Tegan S Cheney said:
I love that you’ve posted these… I personally haven’t done most of these but I certainly can relate to some… good luck to us all
January 16, 2020
Carolyn Powell said:
Instead of having a full cover sheet on the picture, have strips to uncover portions of picture.
January 16, 2020
Raylene Rosse said:
I was never told to seal my paint by diamonds what do I use
January 16, 2020
Christina Whitehurst said:
Thank you so much for the information it was very helpful. I too was making same mistake like completely removing the whole canvas. Thanks again
January 16, 2020
Robyn Scott said:
Has anyone received a diamond painting in the mail that has been a bit scrunched making the painting creased & not sticking in many places?
This makes it very very hard to read the symbols on the painting. Does anyone have any suggestions of how to fix this?
I have tried flattening the painting under books but that doesn’t work. Where the creases are just won’t flatten.
I have managed to finish these paintings, but not without a lot of stress.
Has anyone else had this problem & is there an easy fix to this?
January 16, 2020
LeAnne said:
Thank you for the warnings!!
January 16, 2020
Robyn Scott said:
Is there any glue you can buy when the diamentes don’t stick very well? I have had a few paintings that I have worked on that several of the diamentes keep falling out before the painting is finished & even after.
I have done many many of these paintings & only ever pull the cover back in small sections at a time to keep dust from settling on the glued surface & NEVER leave that area exposed when not working on it. I ALWAYS recover when not working on my paintings.
Also, what do you use to seal your paintings when finished?
January 16, 2020
Sima said:
Never heard about sealing ready picture and about sealant.
January 16, 2020
Margaret said:
Hi
I got one of your kits as a Christmas present and sure enough I did put diamonds on wrong symbol
It still came out beautiful and I will definitely be ordering some items for myself
This is so addicting
January 16, 2020
Kristyne Stephens said:
I have pets so my finished area gets hairy while I’m working on the other areas. I’ve found using a toothbrush to very gently clean it off before sealing works great, and it makes everything sparkle again. But be very gentle or your diamonds will pop off.
January 16, 2020
Joy Saker said:
some canvases come with an A4 page of instructions such as the colour code in a large font. My mistake was to let this touch the glue – instant ruin. I now keep this in a plastic sleeve so those pesky paper fibres cannot bond with the glue.
January 16, 2020
Lucy said:
What do you use to seal your painting after it’s done?
January 16, 2020
Lori Smalley said:
I took a picture of my dogs to have a painting made of them. When I took the picture the sun was shining on half of it, therefore the colors of half of the painting and one of the dogs turned out much different than it was supposed to be. It ruined the whole look of my beautiful picture.
January 16, 2020
Sharon morgan said:
You mentioned a sealant for finished painting is there something like that available and how much is it
January 16, 2020
Shirley nauman said:
What should I seal me finished picture with
January 16, 2020
Sheryl White said:
This tips are very helpful i will be using a couple myself thank you
January 16, 2020
R C said:
I was having trouble with pulling back the paper then it getting in the way. To fix this I got a X-Acto knife and I cut the paper so I can pull up only the section I want to work on. Be warned don’t push to hard on the knife or you might cut your canvas.
January 16, 2020
Coni Smyth said:
Glad I read this before I started on my first one !!
I wish the kits included directions ! I was afraid of starting, but after reading this I’m more confident. Thank you !
January 16, 2020
Denice Lincicome said:
I haven’t started mine yet, but you have given me a lot to think about as I start doing it. So I don’t make those mistakes. Thank you
January 16, 2020
Angel said:
It would be nice to have some pre-cut strips to peel off instead of one solid sheet, especially for larges pieces.
January 16, 2020
Diana said:
Thank you so much for the reminders
January 16, 2020
Bridget Bailey said:
These were VERY helpful!! Thanks for sharing!
January 16, 2020
Socorro Garcia said:
Nice tips, I will be sure not to make any
January 16, 2020
Andrea Lycett said:
I’m working on my second kit, and I love it. My question is: what kind of sealant should I use on my finished project? I haven’t gotten a frame for my first one yet, but since I just read #7 about a sealant, I’m going to hold off on getting a frame. Please let me know what I should put on my picture.
Thank you…… Andrea Lycett
January 16, 2020
joyce Lovato said:
Thank you for the tips. So far I haven’t made these mistakes but tomorrow is another day. Now that I know these tips maybe I will be smart enought to use them.
January 16, 2020
Nancy Sturman said:
I agree with all of them but the last. I have been careful about the others but I personally do not do place the diamonds in sections. I do it by letter or symbol. Have not had any issues with them sticking even I am doing it this way. But either way sounds good! Whatever works for you! I did find
some of my dog’s fur on them even though he is not too close. I also use a lighted magnifying glass while doing mine!
January 16, 2020
Joann said:
I totally agree with 1 to 6 but #7 I don’t agree The way to flatten the canvas is to peel the cover in quarters one at a time them replace and go to the next corner uncover & close back this flattens the canvas your instructions of placing books on top is ineffective. Try it. :)
January 16, 2020