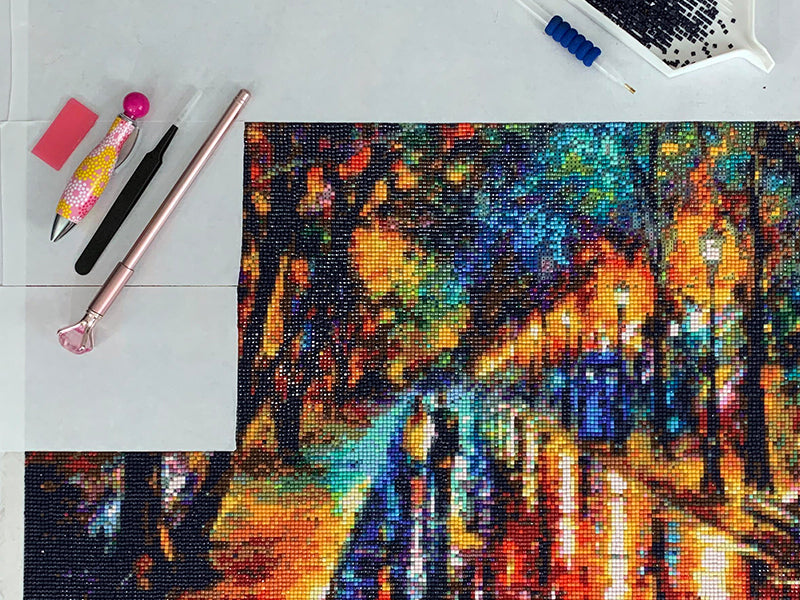

Whether you're currently working on your 17th kit or just beginning on your first, there's always something new to learn in the wonderful world of Diamond Painting!
9. Combat static cling with Static Guard Fabric Spray

8. Break up diamond clumps using 2 trays
No need for surgery to separate diamonds that are melded together! Just use two diamond trays you have lying around. Place one on top of the other and press down - you'll hear a satisfying “POP” when they separate.
For any stubborn diamonds that are resistant to the squeeze, rub trays back and forth until they can resist no more!

7. Use nail polish remover to remove the legend before framing
Have you ever framed a painting and can't help but notice the DMC grid peeking out of the side of the mat or frame? They won't notice it, but it will bother you forever! Catherine Woodward suggests using nail polish remover or acetone on a cotton pad to remove the diamond legend and other writing before framing.

6. Use an iPad to see canvas symbols more clearly
Waiting on your Light Pad in the mail? Have an old or unused iPad lying around? Open up a Flashlight app or a display a blank page in your browser to illuminate your diamond painting experience. Let there be light!

5. Use a puzzle roll-up mat to take your kit with you on the go
Thinking of flying back from vacation early because you just can't live another moment without your diamond painting? Use a puzzle carrier to transport your WIP.
If you have more space and less money, just place your diamond painting in between two pieces of foam board and tape them together.

4. Increase the longevity of your finished canvas by sealing it.
After you're done with your diamond painting (congrats!), you'll want to keep it looking as gorgeous as the day you finished it. Grab some Mod Podge and apply a coating to lock your diamonds in place and keep your painting pristine for years to come.
For more on sealing your finished kit, check out our full guide here.

3. Speed Up Container Refills Using Dry-Erase Double-Sided Tape
Refilling your diamond containers can be a real bore, especially when you have a large painting. You have your symbols on your vials, but your symbols are not on your bags of diamonds.
The solution? Use Dry-Erase Tape and multi-colored markers to put the symbol, DMC code, and color on your container lids.

2. Use the "Checkerboard Method" for large areas with the same color
Going crazy over large areas with the same color? Mix things up (and keep your rows straight!) by using what we call the "Checkerboard Method."
Just place a diamond in every other box and then go back and fill in the spaces. You'll get a satisfying "click" when you fill in a blank space with a diamond!

1. Use baby wipes to fix damaged canvases
Whoops! Drop a piece of paper on your canvas? Just dampen the area with a baby wipe and then swipe away the crud! Wait a bit for the canvas to dry before continuing on your project.

Have a hot tip or trick we missed? Leave it in the comments down below!
Comments
rhonda said:
If you don’t have any sticky, on your canvas. MAYbe “Aleene’s Tack it over and over” would work. I use it on my stamps that don’t stick anymore, that is for card making. IT holds very well.
May 17, 2023
Amanda said:
I had gotten foil stuck to my diamond painting and I used Krus Kutter for fabric to remove it. It worked famously and no damage to my painting. I used dotz stick to reapply adhesive I’m finishing it now
August 17, 2022
Pamela said:
Use the Mod Podge Super Gloss, instead of regular to keep the sparkle.
April 04, 2022
Maxine said:
I use regular Mod Podge to seal my diamond art, brush it on and make sure you get in all the crevices. Wipe the top of the diamonds off with a damp rag and rinse and wipe often. Your Mod Podge will act like a grouting. You will be very pleased with the results. I sure did. Hope this helps. Happy day!
April 04, 2022
Kate Joyce said:
I went thru the comments and kept seeing that Mod Podge dulled their finished project. Mod Podge comes in a variety of finishes. I use the GLOSS-LUSTRÉ, shines better than the original.
February 01, 2022
Kristen said:
I use the pill containers also, (the ones that hold 28 ).. instead of double sided tape or cutting them out and taping paper onto them, try chalkboard paper I think it’s called. It’s basically a sheet like a sticker that you can write on with chalk markers and cut to fit onto the boxes… then just wipe away with a damp cloth when finished and reuse! Works wonders. I keep the leftovers in a huge box with little containers that are similar to the ones for tic-tacs. This works great and I always have TONS leftover. One day I am going to use the extras and basically “diamond paint” onto these wooden letters I have as a new craft project.
September 28, 2021
Marg said:
The picture was packed tightly and when Ipulled the clear sheet off some of the stckyness has come away What can I use to create a sticky film in the missing parts? Ta
September 07, 2021
Carlene said:
I watched a video from a lady on how to frame your painting and one of the things she suggested you do is to put washi tape around your canvas after your done this way none of the canvas shows when framing
June 21, 2021
Evie said:
Why does the light board come with a plastic cover
May 03, 2021
Frances said:
What is a way to get the diamonds to show the faceted side up in my tray?
April 09, 2021
Anna Allison said:
I spilled my diamonds on the floor while pouring them in a container out of the bags they come in. I tried sweeping them up with my hand but that didn’t work out to well. Then I spotted a roll of lint remover and it worked great. I just rolled it around the area picking up all the diamonds. True it picked up a little of everything on the floor. But once you have them just pick out the diamonds from the lint remover sheet.
February 11, 2021
Robin Galbraith said:
I had to wait for replacement diamonds. By the time I got them the canvas was no longer sticky. What can I do to get the missing diamonds to stick to the canvas.
January 13, 2021
Shirley Bunch said:
I need to know how to properly remove you round grid without it tearing apart. And how to properly use the square grid. The few videos I’ve watched weren’t alot of help.
December 16, 2020
Peggy Scefcyk said:
I have found that when you seal the picture with Mod Podge, it takes the sheen away so I found Mod Podge with glitter to seal my picture. It makes it shine like the original picture before sealing. Try it instead of the regular Mod Podge.
December 16, 2020
Denna said:
I accidentally got two colors mixed up on my picture. I was able to pick them all off and redo it but all the diamonds I had extra that I picked off are all sticky now and sticking together. Is there anything I can do to help with this?
April 17, 2020
PATRICIA said:
I WILL BE DOING MY 1ST PAINTING, IS THERE A TIP I SHOULD KNOW AND USE RIGHT AWAY.
SOME OF THESE TIPS I HAVE KNOW IDEA WHAT UR TALKING ABOUT. LOL
ANY HELP WOULD BE APPRECIATED.
THANK yOU
April 17, 2020
Libby Bays said:
Love the idea of painting the edges before framing thus making it look like a mat. That’s where I find the hardest thing is the framing cause all the ones I have done are not your standard size like a 8×10, 12×14 etc. Thanks for the tip. Going to try it on my next one.
April 02, 2020
Laurie Hamacher said:
Don’t throw away your pens.
My diamond dotz pins weren’t picking up the diamonds any more. I found, that if you remove the built up old wax from your pen, you’ll be able to pick up your diamond dotz again.
March 03, 2020
Deb said:
I only remove a 10 drill x 10 drill square of the paper to expose adhesive, cutting it away. Don’t have to worry about anything messing up the work surface that way. Also, small Dixie cups from the dollar store work perfectly to hold drills. I can write number and draw shape inside cup and stack them alpha, numerical, and symbols together. Makes organizing very easy.
March 03, 2020
April Naylor said:
These are helpful tips and good comments. Blu tack can be useful to stick the diamonds onto your work project with the pen.
March 03, 2020
Erika said:
Use blue wall stick for the adhesive in your drill pen instead of wax. it lasts a thousand times longer. and it’s cheaper too..
March 03, 2020
Leslie said:
Use baby powder around the edge of the picture where the adhesive extends beyond the DP area
January 16, 2020
Terri said:
Thanks for sharing all of your tricks very helpful . I have only done one so far but I have 10 or 12 more waiting for me to do . I think I found my
January 16, 2020
Sarah said:
The helpful hints on here are great.
I ran into a problem after completing a picture and covering it with Mod Podge. There was a missing diamond that would be noticeable, but a full diamond wouldn’t fit. I placed the diamond, flat side down on a piece of scotch tape and trimmed it, double faced tape would have worked, but the other tape was handy. A tiny dab of glue holds it on the canvas. A tiny dab of Mod Podge covers it without it being noticed as an after finish addition.
November 20, 2019
Sarah said:
Static cling was causing a problem filling plastic containers from the little plastic bags. I placed a few bags out on my lap tray. On top of them, I placed a frozen lunch bag pack. On top of the pack, I set some of the plastic containers. One at a time, I slipped a cold diamond pack out and poured the diamonds into a cold plastic container. It took just a few minutes to fill 30 containers with no diamonds stuck where they didn’t belong, like on my hands and sweater sleeves.
November 20, 2019
Linda Ericsson said:
I use a seven day pill containers (will hold 28 colors) for all my projects. The lids snap securely and each section holds most if not all the diamonds needed for a project. Perfect for travel – they’re flat and the lids snap securely – just grab the container and mat and your off. I use a labeler to print the number for each section but you can also write the numbers on paper and use double sided tape. Takes a little time but worth every minute!
November 20, 2019
Dalma said:
To help keep the drills apart I wipe out the trays with alcohol wipes to remove the oily feel of the trays. I also use chux wipes soaked in fabric conditioner and let dry and cut into small pieces. Place into the containers to help with the sticky drills. Works well for me. Happy drilling.
November 20, 2019
Linda Deslauriers said:
I love doing the 5D paintings. It is very relaxing for me & it keeps me busy I am 71 years old & it is an excellent pass time. I have 16 paintings done & I have 8 more to do, I have giving some away for gifts. They make beautiful gifts for people who have everything. Enjoy.
November 20, 2019
Cynthia said:
Another way to travel with your diamond art is to roll it up into a clean towel that is larger than your canvas. Thanks for the tips! :-)
October 18, 2019
Brenda said:
Any ideas on why the pink was keeps trying out in the pen tool? After awhile, even tho I keep the lid on the wax, it seems I have to keep reapplying the wax in the top of the pen tool and it falls out of the pen too. Please help???
October 18, 2019
Barbara Winters said:
On some small DP’s sometimes the eye or other detail does not show up-I use a black marker on the finished DP and paint it in.
October 06, 2019
Sherrie Beckstead said:
I have enjoying Paint With Diamonds. I have several done.
October 06, 2019
Karen said:
Great tips
October 06, 2019
Cindy Soltis said:
I found the sticky paper hard to remove and to put back on. I used parchment paper to cover my diamond painting easy to remove and to place back on to protect my painting from dust or dirt. I love my diamond paintings. I was always into doing crafts. then in 97 I had a stroke which left my left side paralyzed so all my crafts came to an end since I’m 1 handed now, most of my crafting came to a stop. Thank you diamond painting for letting me do crafts again. It is a very relaxing hobby. So very rewarding when its all done.
October 06, 2019
Wanda Hankins said:
Is there a way to sell the diamond painting (new unfinished -not completed)
October 06, 2019
susan cline said:
what is the best way to remove wrinkles in a partial painting also what is the pen people are using for the drills, the one that comes in the kits I am not having very good luck with them
October 06, 2019
ELlen said:
I am always hitting the tray to keep diamonds “right side up”. Anyone know a better way????
October 06, 2019
Lillian Jett said:
I have really enjoyed looking and reading all of this it really helps when you are a first timer lololol Thank You For Sharing…
October 06, 2019
Joyce Dawson said:
I tried the modge podge on a picture and it took off the shine of the drills. So I am removing it. It is a tedious process
October 06, 2019
susan retterath said:
I make a copy of the DMC grid. The paper one that usually comes with the kit. Then I cut the codes apart and tape them to the top of my containers. Then I don’t have to try drawing the symbol and can’t figure it out later cuz sometimes the symbols are hard to copy, and taking the tape off for the next project is easy.
I have also found that two sided tape works VERY WELL if you have a spot that is not sticky on your picture. That has happened to me several times
October 06, 2019
Darhl said:
Love your tips, and tricks, Thanks
October 06, 2019
Sara Fisher said:
Awesome tips
October 06, 2019
Bonnie said:
Note number 9 is very important
October 06, 2019
Jeannette Guess said:
Thank you so much! I had questions and this info answered it for me. I especially wanted to know how to stabilize my project before I handed it over to a framer. Continue the good work. All hints are greatly appreciated.
October 06, 2019
Gayl Tomaszewski said:
Being the new kid on the block with PWD,I can use some help. Bought a light pad to put under the canvas. But can’t figure out how to place under and still keep canvas from not moving.
October 06, 2019
CHRISTINA MYERS said:
My husband dropped a piece of paper on his custom diamond painting and I used your tip of using a wipe to remove it. It worked beautifully!!!
October 06, 2019
Adele said:
How to you remove saran wrap stuck to the canvas?
October 06, 2019
margaret ward said:
great tips
October 06, 2019
Sally Monville said:
I really enjoyed getting some tips on how to make diamond painting easier. I especially liked the checkerboard method to break up the boredom of large areas. The roll-up mat is also a great idea for storing unfinished work. Sometimes I get gems that are hard to separate so using two trays on top of each other and pressing down is a good idea and I will be trying that with my next kit! Thank you for some helpful tips on diamond painting.
October 06, 2019
debbie teachout said:
Instead of rolling the canvas up. I use pool noodle, and wrap the canvas on that to transport.
Also I use a small hand held snow scraper to push up the rows, or a small kitchen spatula.
October 06, 2019